Want to recover lost data or files from formatted hard drive, extenal hard drive, USB flash drive, SD card, etc.? Here is the guide you can follow to get back lost data from all kinds of storage devices safely and quickly.
Overview on recovering data from formatted hard drive
Hard drive or local disk on computer or laptop holds all of our important files, such as applications that we need to perform certain functions, files we prepare for work or school, photos that were taken at memorable occasions and data we have collected for years. Though files on hard drive are of great importance, only a few users would like to create an additional partition or get an external hard drive to store backup files for operating as well as other data. As to such cases, once the hard drive gets formatted due certain reasons, all files on the drive will be wiped off. What’s worse, most of users might formatting hard disk without any backups of files or operating system.
Is it possible to recover data from formatted hard drive?
In fact, formatting of hard drive can’t permanently erase files, which only wipes data from the address table which records how files are stored. This means that formatted files are still recoverable and hard disk recovery is very possible before new files are stored on the drive. Therefore, it is strongly advised to recover formatted data at once.
To get back formatted data, you can ask assistance from recovery company as well as format recovery software like Eassos Recovery. This software enables you to finish the recovery with a few clicks of mouse button. You can follow the guide below to recover lost files.
How to recover data from formatted hard drive?
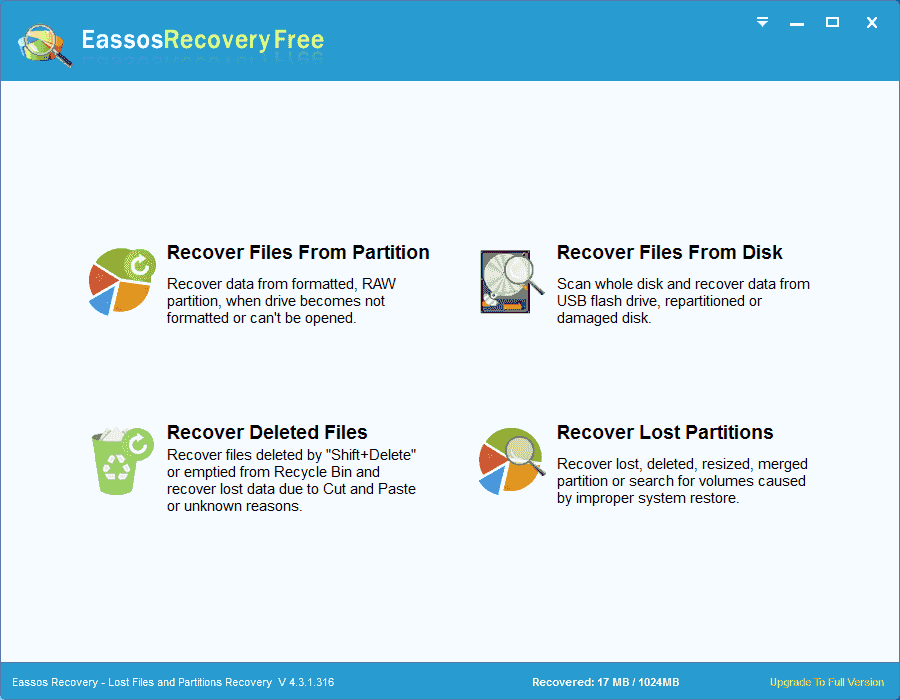
Step 1: Install and launch the format recovery software and choose correct recovery module.
If the entire hard disk gets formatted, you have to plug it to another computer before recovery. Besides, the recovery software is not allowed to be installed to the hard drive, either.
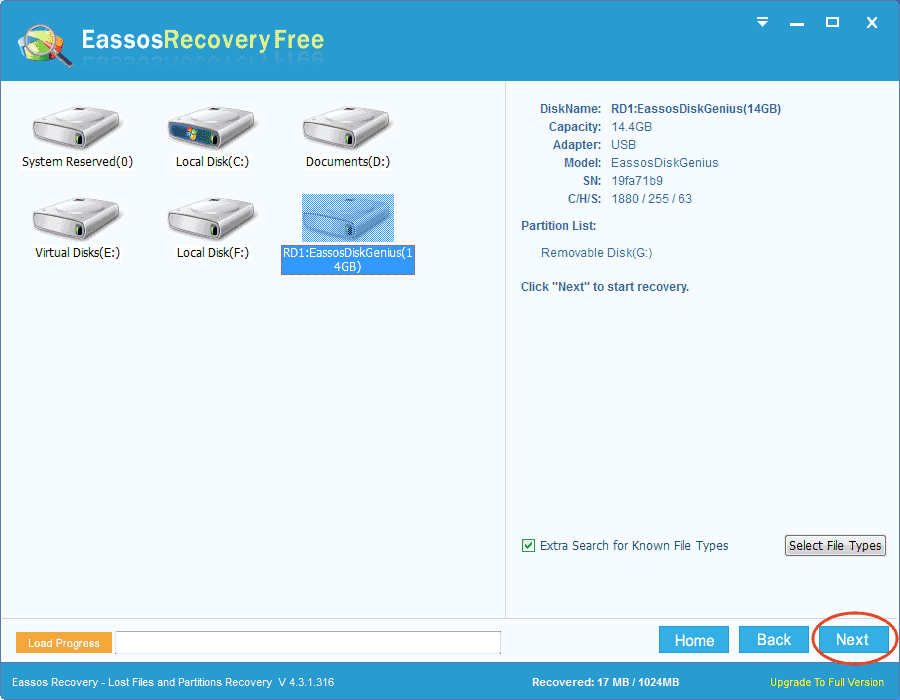
Step 2: Choose the partition or hard drive where you want to recover formatted files and click “Next” button, and then the software will start to scan the selected area.
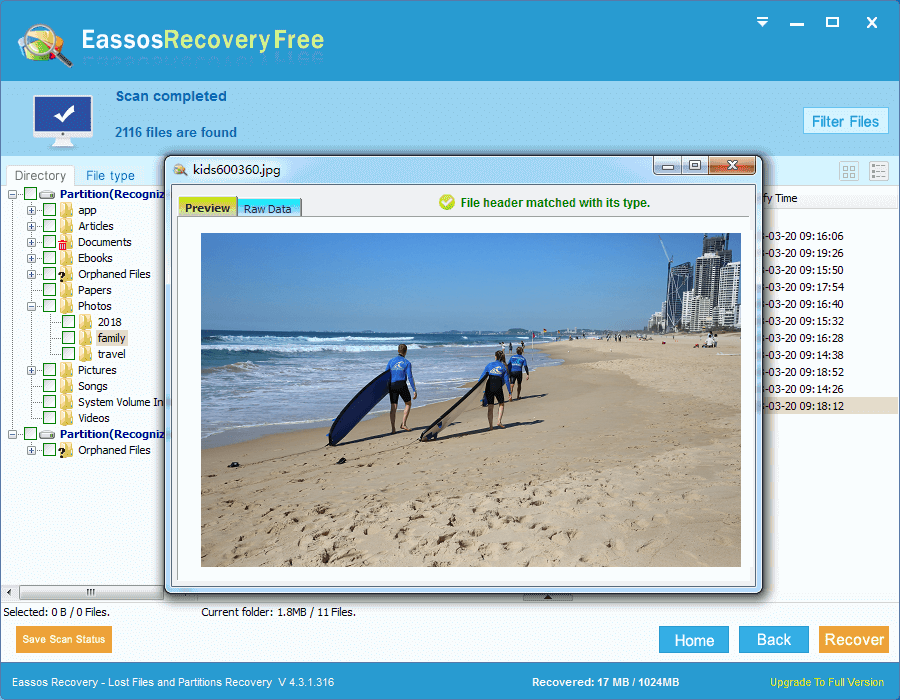
Step 3: Preview files and recovery.
After scanning, you can see all listed files found by the program. You can preview them one after another double clicking file.
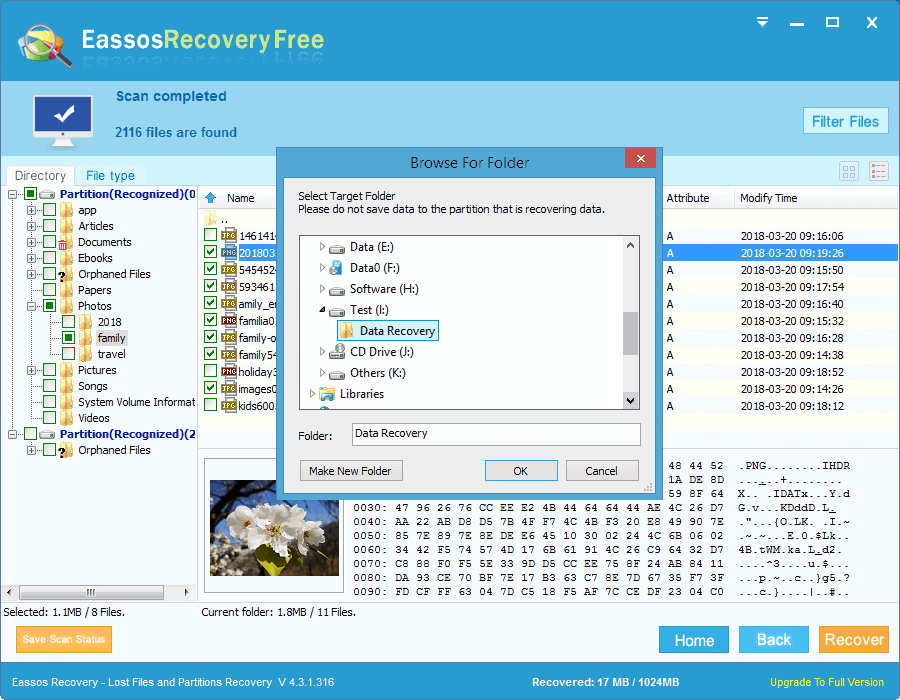
Step 4: Mark all files you need to recovery and click “Recover” button, after which recovered files will be saved to a specific folder.
Do not save recovered data to the original location in order to avoid file overwriting.


