This article includes step-by-step instructions on how to create a partition in Windows 11, Windows 10, Windows 8 and Windows 7 using DiskPart, disk management and free Windows partition manager. If you want to create a partitions, you can follow one of these methods to create volumes easily and quickly.
About creating a partition in Windows 11/10/8/7
Many computer’s disk and partitions are not in the best state. If the disk hasn’t been partitioned into multiple partitions after Windows is installed, you’ll find the partition layout is not reasonable for data storage. If you want to put operating system and personal data in separated partitions, you may need to create extra partitions. Or you may want to create multiple partitions so that you can put different type of data in specified volumes. Besides, some people create partition in order to makes use of unallocated disk space.
What is partition?
Partitioning disk is the process of creating one or more regions on storage devices, so that operating system can access data in each volume. Creating partition is the first step of preparing disk space to be used by system. Partition information, such as partition location, size, type, etc. is recorded in partition table which helps operating system to access each partition. Partition can be created, deleted, resized, cloned, hidden, formatted, etc. by partition management software. Usually, once a partition is created, it will be formatted before it can be used. You can format partition to various file system formats like exFAT, NTFS, FAT32, EXT4, EXT3, HFS+, etc. so that it can be recognized different operating system.
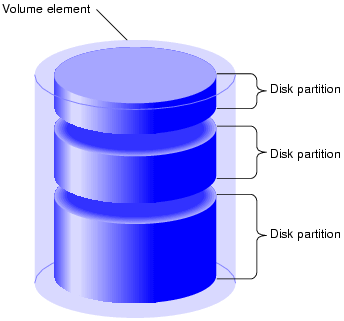
Benefits of creating multiple partitions
- Easy to back up operating system. Backing up OS is necessary in case of any accident errors, such as crash, blue screen, etc. Usually, system is backed up to an image file which should be stored on a partition different from system partition.
- Install multiple operating systems. Quite a few users would like to install multiple systems on their computer, thus single partition is not enough.
- Separate system and data. System partition won’t be affected when other partition is running out of space; non-system partition won’t be formatted and lose data if you re-install or restore OS.
- Creating multiple partitions helps organize and manage files efficiently. For example, if you put everything in one partition, you may have to create folders with many sub directories to store different types of data. In that case, you may have to spend more time to reach deeper folders.
How to create a partition in Windows 11 / 10 / 8 / 7 with Disk Management?
- Open Windows Disk Management. Hold the Windows logo key from keyboard and press R key to open Run utility. Type msc in Run dialog and click “OK” button.
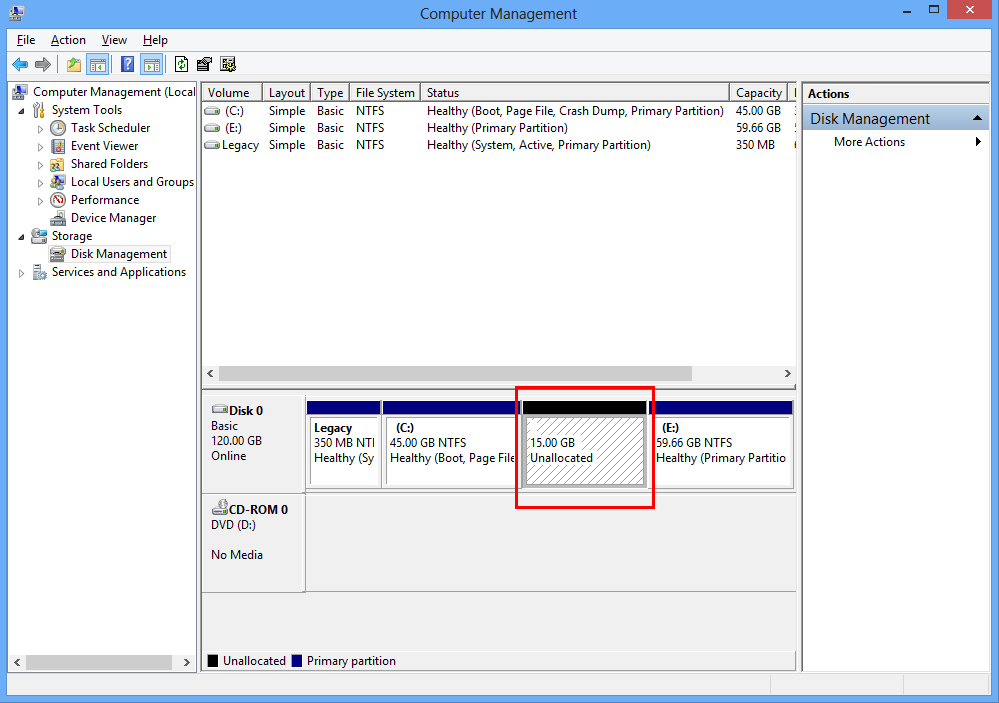
- Right-click on unallocated space on your hard drive and choose “New Simple Volume” option. If there is not free space on your disk, you can shrink one partition that contains large free space by right-clicking it in disk management and select “Shrink Volume”. Then follow the onscreen instruction to shrink partition.
- The New Simple Volume Wizard opens up and it will help you create a simple volume on a disk. To continue, click Next.
- Assign a drive letter or drive path to the partition you are going to create. You can choose any drive letter which is currently in use, then click Next.
- Select file system and set volume label for the partition. Usually, file system of hard drive partition on Windows OS is NTFS.
- Click Finish button when you have successfully completed the New Simple Volume Wizard.
How to create a partition in Windows 10 using DiskPart?
- DiskPart is a useful Windows built-in utility which is able to create partition, clean disk, format disk, etc. However, the process of creating partition with DiskPart causes data loss. You have to back up all important files on the disk before trying following steps.
- Launch Command Prompt. In Windows 7, you can open it by clicking Start > All programs > Accessories, then right-click “Command Prompt” to choose Run as administrator. If you are using Windows 10, right-click Start button and select “Command Prompt (Admin)”
- Enter following commands with each followed by pressing Enter key.
diskpart

list disk

select disk # (replace # with the number of the disk you want to create partition)

clean

create partition primary size= # (# means the partition size and it is in megabytes, replace # with exact number)
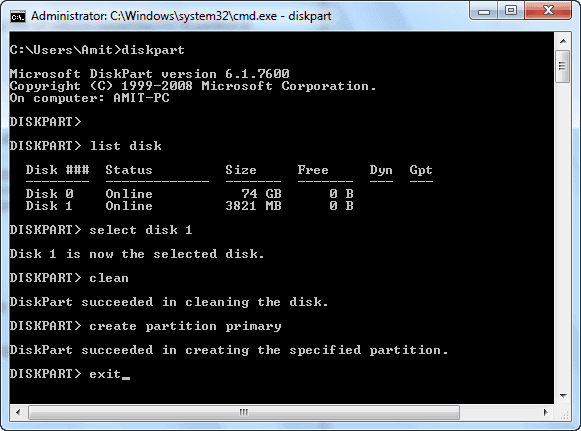
These steps can be used to restore USB drive back to full capacity and repartition USB drive and HDDs.
How to create a partition in Windows with partition manager?
DiskGenius (old name Eassos PartitionGuru) is free Windows 7 disk manager, which provides you with all-inclusive features to disk & partition management as well as data recovery. It is able to partition / repartition or recover data from HDD, external HDD, USB flash drive, SD card, virtual disk and SSD. Thus, we can use it to create partition in Windows so that we can make use full use of disk space.
- Run DiskGenius (old name Eassos PartitionGuru) and you can see unallocated space on your hard drive. Right-click free space and select “Create New Partition”.
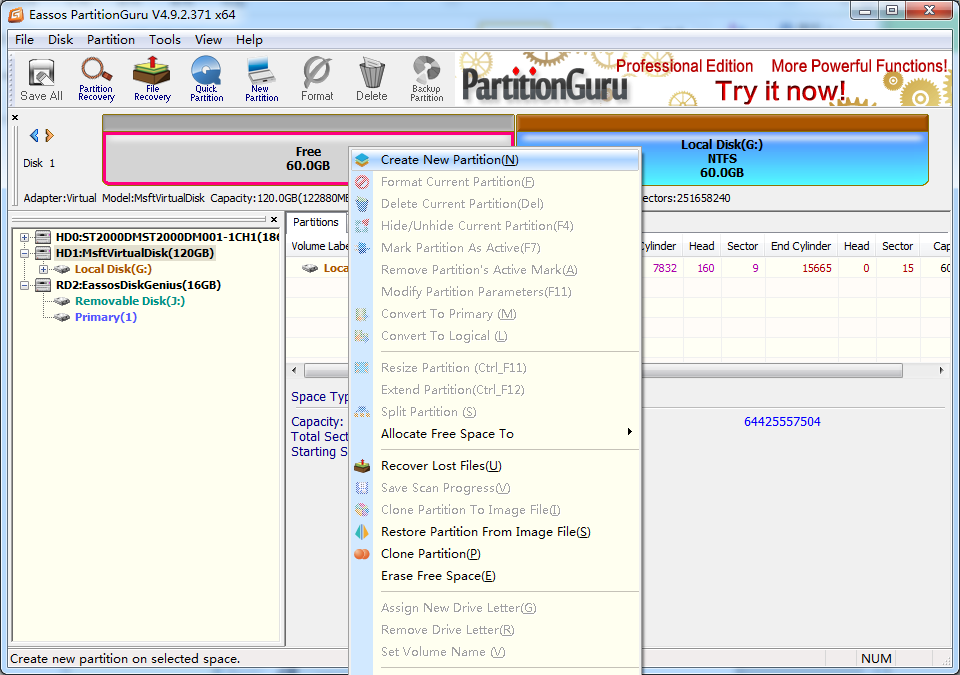
- The “Create New Partition” window opens up. Select partition type and file system type, and click “OK” button. As to file system type, you can choose FAT32, exFAT, NTFS, EXT4, EXT3, EXT2, etc. for the new partition based on your demand.
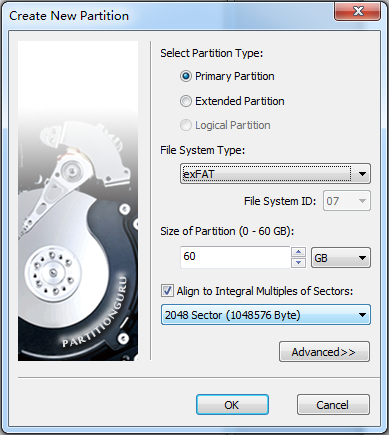
- Click “Save All” button from DiskGenius (old name Eassos PartitionGuru) main interface to save the new partition to partition table.
- Once changes are saved, DiskGenius (old name Eassos PartitionGuru) prompts to format the newly created partition. It will be formatted to the file system type you select in step 2.
How to create a partition on existing volume without data loss?
DiskGenius (old name Eassos PartitionGuru) can also create partition even though there is not free/ unallocated space on the disk without losing data. In this case, the process of creating partition does not perform formatting. Thus, you can try this method to add partition.
- Select one partition which contains much free space and then click “New Partition” button from toolbar. Also you can right-click the partition to select “Create New Partition” option from context menu.
- Set partition size and click “Start” button. You can enter exact partition size in the input box or set via dragging mouse on partition bar. Remember to set the disk space split from the partition as “Create New Partition”.
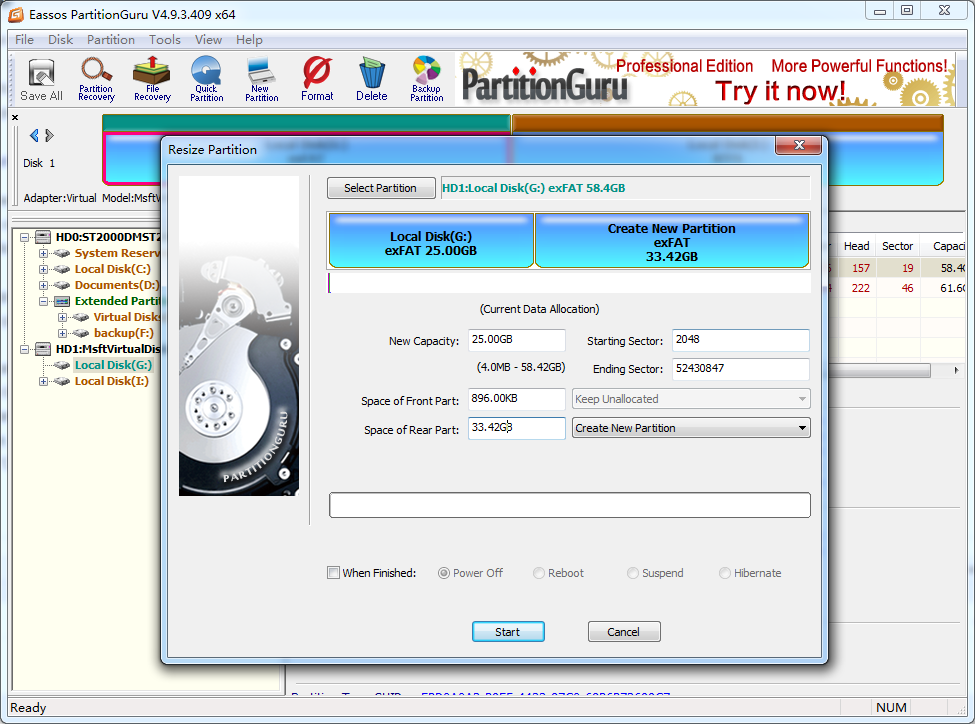
- DiskGenius (old name Eassos PartitionGuru) will prompts operations to be done, you just give confirmation by clicking “OK”. Once the process is done, click “Complete” button and close the program.
Vidoe guide on how to create an ext4 Linux partition in Windows 10/8/7:
Conclusion
This guide presents four method to explain how to make partition in Windows 7/8/10, and you can choose any of these to create partition based on your preference. Hope this guide helps a bit in helping you manage disk space and partition in Windows.
