USB data recovery software is designed for users whose heart is nearly broken because of losing important data. Losing precious data is an awful experience to many users, especially when lost data doesn’t have a recent backup. The USB data … Continue reading
Tag Archives: data recovery
Reasons Why You Fail To Protect Hard Drive From Data Loss
Gallery
Have you ever undergone such experience that your files and folders get lost from computer or other storage devices? That happens quite frequently every day, but many of us fail to take it seriously. If you think data loss will … Continue reading
RAID Recovery Software—PartitionGuru
Link
What is RAID?
The term “RAID” stands for redundant array of independent disks which was originally redundant array of inexpensive disks. RAID is a storage technology that combines multiple disk drive components into a logical unit for the purposes of data redundancy and performance improvement.
Advantages of RAID
RAID is designed to improve performance and reliability and obtain larger capacity. Users don’t need to care how many disks form the RAID, for a RAID appears to the operating system to be one single logical hard disk. RAID technology possesses following advantages:
- Provide large disk space. 2TB hard drive is large enough to common users at present, which, however, is far from enough to enterprise users. Larger disk space can be created by RAID composing several hard drives, for instance, compose five 2TB hard drives to 10TB disk space via RAID 0.
- Fast speed. Being one of the most important parts of computer, hard drive develops quickly in capacity, and yet its speed improves slowly. RAID enables several hard drives to work at the same time, plus, these hard drive appears to be one hard drive logically, thus RAID reaches a speed that several or dozens of times of one single hard drive.
- Improved data security. The parity and mutual image backup provides fault tolerance and ensure data security and reliable.
RAID data recovery with PartitionGuru
PartitionGuru provides powerful data recovery functions for files recovery and partition as well as RAID data recovery, BitLocker drive recovery, etc. It can reconstruct virtual RAID when RAID disks go wrong, and then recover files and partitions from RAID disks just like from local disks.
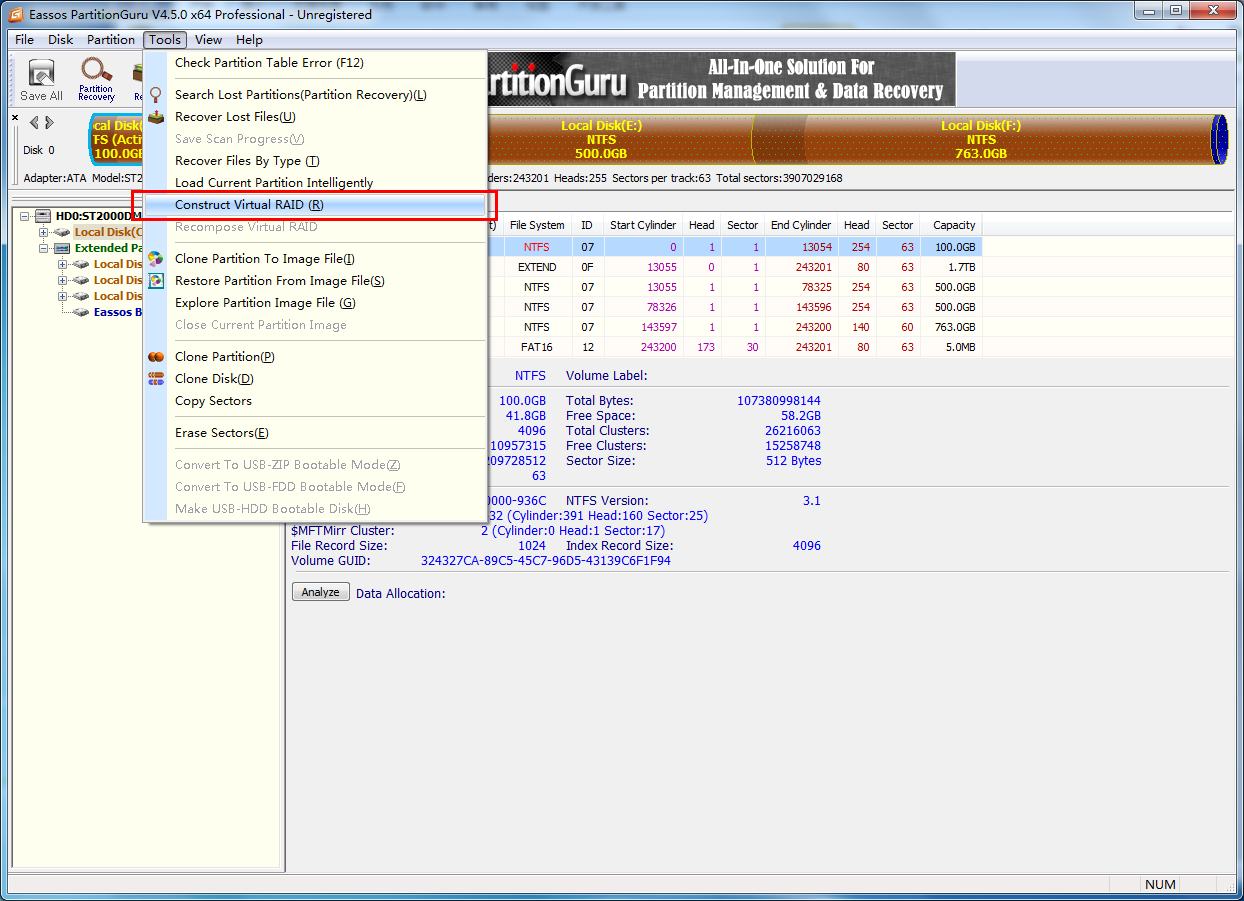
To construct virtual raid, please follow the steps here: start PartitionGuru and then clisk the menu “Tool” to find the item “Construct Virtual RAID” as in the pictures below:
Recover Files By Type
Gallery
Most frequently used data recovery modes adopted by data recovery software are recover lost partitions and file recovery which includes recovering deleted files and formatted files. Lost partition recovery is mainly used to get back lost partitions that can’t be seen in Disk Management, while file … Continue reading
D:\ is not accessible. The parameter is incorrect
Image
Drive not accessible. The parameter is incorrect
It frequently occurred that partition on hard drive or external hard drive can’t be opened and reports the error like “D:\ is not accessible. The parameter is incorrect.”
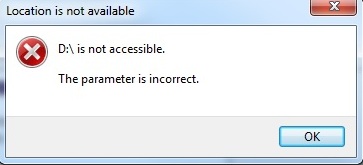
Various reasons can lead to this problem:
- Power failure for powered hard drive;
- Plug out hard drive in an improper way;
- Virus attack;
- File system goes wrong;
- Bad sectors.
How to deal with this problem without losing files in the partition? If you Google this problem, you’ll find many answers that suggest performing chkdsk or formatting, however, after which files will get lost.
How to recover data when drive is not accessible?
Step 1: Connect the storage device which is not accessible and reports “The parameter is incorrect” to computer. Then it can be recognized by your system. If your computer fails to detect it then try another USB port or PC.
Step 2: Download, install and launch Eassos Recovery to PC. Select the first recovery mode and enter next interface. This feature is capable of restoring lost data from damaged, RAW or formatted partitions.
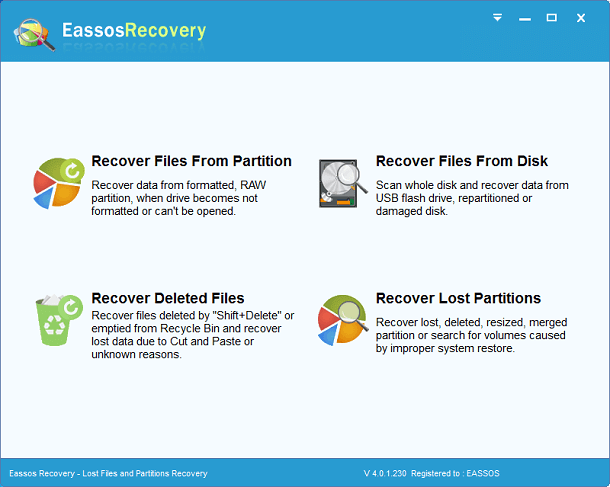
Step 3: Select the icon representing the inaccessible partition and click “Next” to continue.
Step 4: Eassos Recovery checks partition information and searches for lost files and file directory. It displays files while scanning process is working and keeps updating scanning results as more files are found out.
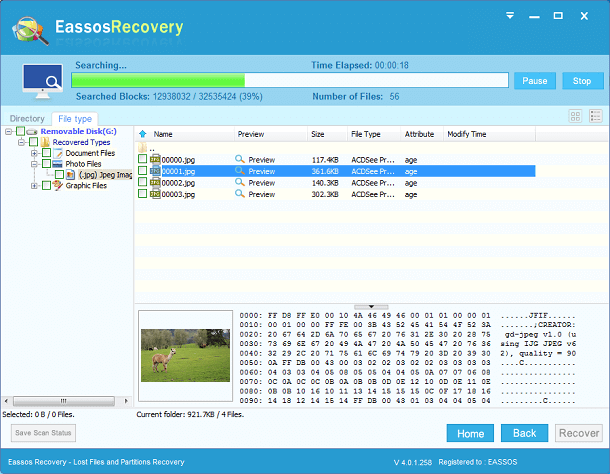
Users are allowed to preview files while scanning is working and they can pause or stop scanning if all desired files have been found and there is no need to make further scanning.
Step 5: Save files to a safe location such as any healthy partition that has enough disk space to hold these files and doesn’t need recovering data.
E:\ is not accessible. The file or directory is corrupted and unreadable
Gallery
This gallery contains 1 photo.
USB drives are quite popular these years and they really bring about convenience. They are portable, small size, large in capacity, etc. and satisfy various data storage demands. Sometimes, partitions or other storage devices such as USB flash disk, external … Continue reading
Eassos Recovery 3.6.0 released!
Eassos Recovery updated to the version 3.6.0!
The new version improves in the following aspects:
1 The function “recover files by type” increases the support of sldprt file type produced by SolidWorks.
2. Rectified the problem that the file recovery function still copied files that had been filtered.
3. Improved the support of differential VHD disks.
4. Rectified the problem that sometimes disk couldn’t be seen when it had bad sectors and it was recognized as “uninitialized” in disk management.
5. Fixed the bug that the program stopped searching lost partitions when meeting bad sectors.
6. Fixed the bug that large BMP files couldn’t be previewed.
Click here to download Eassos Recovery: https://www.eassos.com/download.php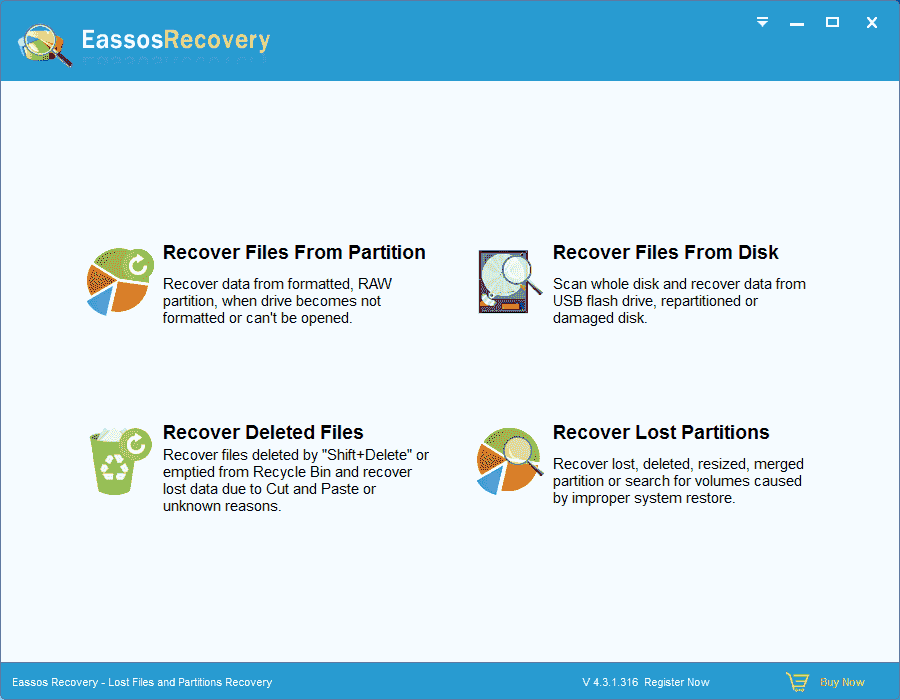
Sector Edit is Available For Partitionguru 4.4.0
Gallery
PartitionGuru updated to V4.4.0 yesterday, adding the function of sector edit. Here are the improvements of the newly released version: 1. Added sector edit function. 2. Enhanced the speed of partition backup with the backup mode “all files”. 3. Added … Continue reading
Data recovery and data recovery software
Gallery
We are living in an age of information and technology, and all of our data is stored on storage media like computer, external hard disk, USB flash disk, SD card, etc. Convenient as it is, sometimes this way of data storage … Continue reading
How to delete files permanently and ensure data security?
When you are looking for ways of recovering lost files, have you ever spared one second to think about how to delete files permanently or make files unrecoverable? As we all know, files that are formatted or deleted by keys “Shift” and “Delete” can be recovered easily through certain skills. Therefore, it is really necessary to learn how to delete files permanently so that there is no possibility to get them back or threaten data security.
Advanced as data recovery technology is, we still have a way to make files unrecoverable as long as using a special tool. Here I’d like to choose PartitionGuru as an example to demonstrate the whole process.
PartitionGuru, mainly a piece of data recovery and disk management software, provides the function needed here. You may ask why the program has contradictory functions. That because both data recovery and delete data permanently comply the same theory. When you delete a file, the data is still on the hard drive instead of erased forever and operating system just mark the place taken by the deleted file as free so that other files can be written to there. Thus the deleted file can be recovered before a new file is written over. Thus to make files unrecoverable, PartitionGuru can just overwrites the files with random character at the same time it deletes files.
Method 1
After launching PartitionGuru, Right click the files you want to delete and select the item “Delete Files Permanently“.
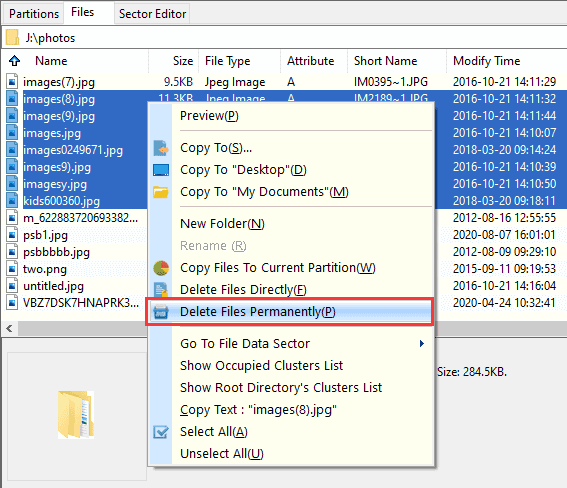
You can appoint the characters that will be used to overwrite files.
Method 2
The first method will not be appropriate when you want to delete all the files of the whole partition or disk, and method 1 doesn’t work on files that have already been deleted or formatted.
Get the program started and select the partition or disk to be erased data. Then click items “Tools” and “Erase Sectors” in sequence and then you’ll get a dialog box to choose characters that are used to fill sectors.
When the operation is done, all the files on the partition or disk can never be recovered, and nobody will know what kind of data has been saved on the partition, and no one can recover those files by any means, either. So be aware when you carry out the operation.
